
Typical weightlifting knowledge says the entrance rack is the gold customary entrance squat grip.
However let’s face it: not everybody can do it.
Wrist ache, shoulder tightness, and the almost-choking sensation it will possibly trigger typically push gymgoers to search for different choices.
Whereas most various hand positions lack the entrance rack’s stability, a couple of work effectively—if you know the way and when to make use of them.
On this article, you’ll be taught three entrance squat hand places that work for any weightlifter. You’ll additionally learn to do them and get tricks to make every grip as comfy and steady as potential.
Key Takeaways
The entrance rack is the very best entrance squat hand place for stability. The draw back is it requires good mobility.
If the entrance rack isn’t an choice, entrance squatting with lifting straps or utilizing the crossed-arm grip are efficient options.
The crossed-arm grip reduces pressure in your wrists however could really feel much less steady because the weights get heavier.
Lifting straps aid you mimic the entrance rack grip, so performing the entrance squat with straps is a good answer for individuals who battle to keep up the entrance rack unaided.
As a result of lifting straps can help you inch nearer to a rack place over time, they’re a useful gizmo for bettering mobility.
What Are Entrance Squats?
Entrance squats are a decrease physique squatting train the place you place a barbell throughout the entrance of your shoulders and maintain it in place together with your fingers.
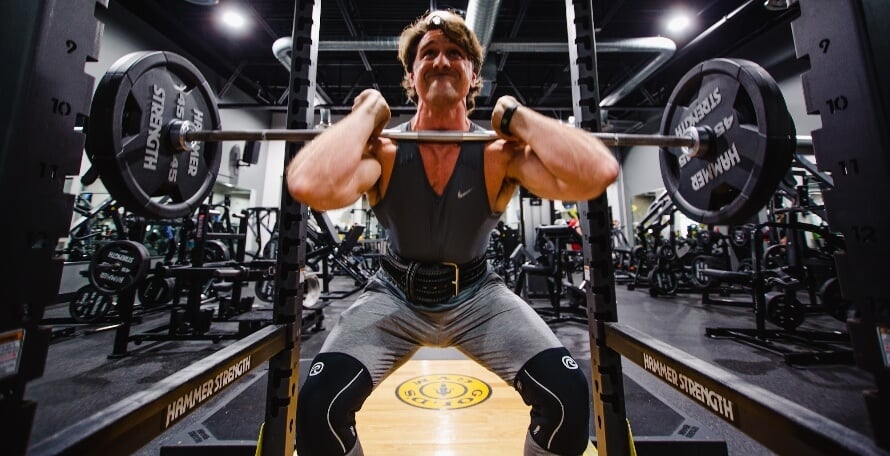
The most typical hand place for entrance squats is the “entrance rack.” Right here’s the way it seems:
Whereas the entrance rack is steady and efficient, many individuals battle to keep up it as a result of wrist and shoulder mobility it requires.
For that reason, gymgoers have lengthy experimented with other ways to place their fingers whereas entrance squatting. Most of those options aren’t steady sufficient to can help you raise heavy weights safely, however a pair work effectively . . .
3 Entrance Squat Hand Positions for Most Consolation & Stability

Of all of the entrance barbell squat hand positions individuals have tinkered with through the years, the simplest are the entrance rack place, the crossed-arm entrance squat grip, and the lifting straps entrance squat grip.
Let’s have a look at why these hand positions are sensible, the best way to arrange and use them appropriately, and tips about the best way to make them as steady and cozy as potential.
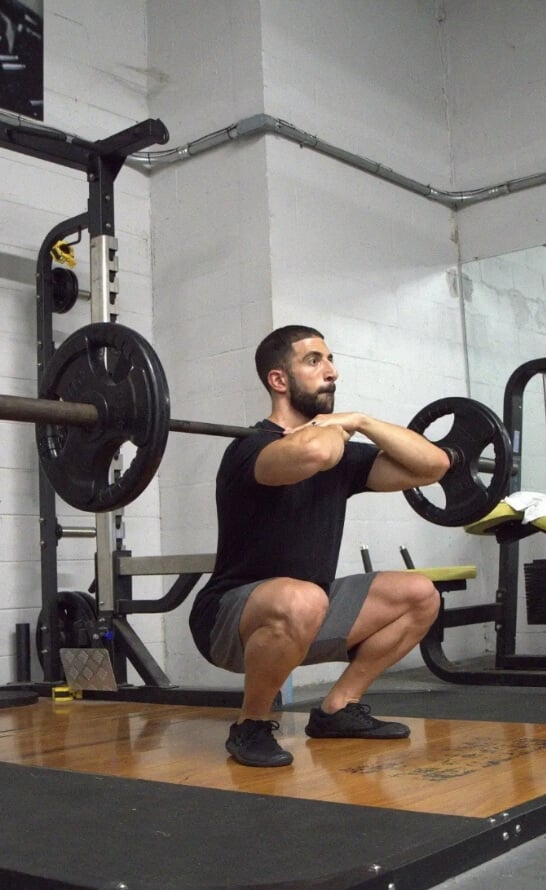
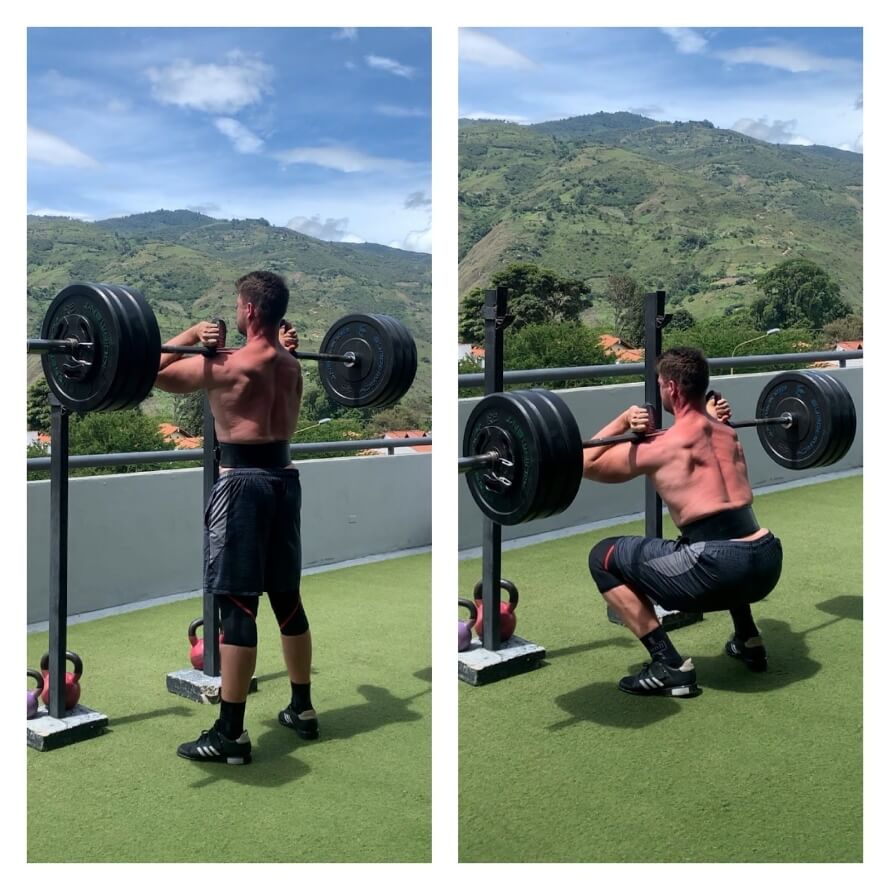
1. Entrance Rack Place
As we’ve already seen, the entrance squat rack place is the most typical, steady, and protected hand placement for entrance squats, which is why I sometimes advocate it. Nevertheless, it’s additionally essentially the most difficult to keep up, particularly should you lack wrist or shoulder mobility.
To make it simpler, there are a few variations to think about:
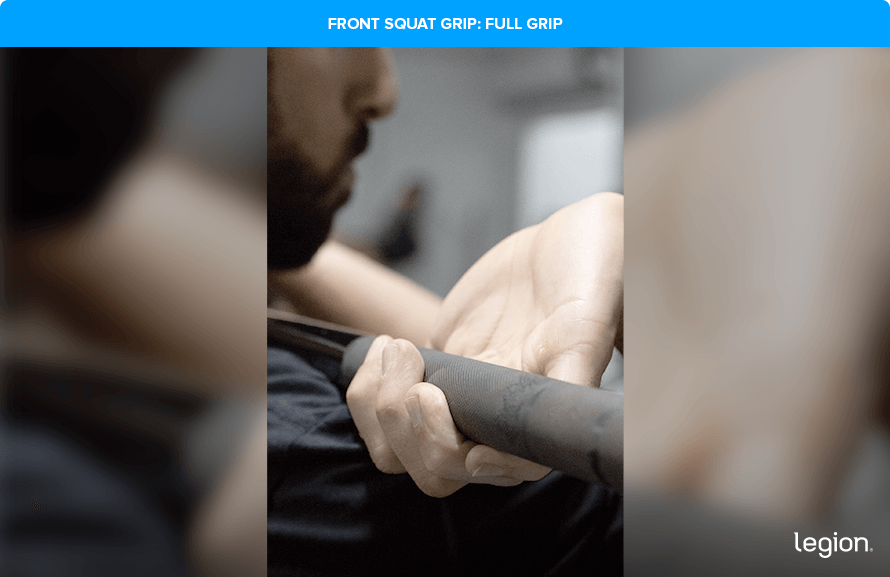
Full Grip: This includes wrapping all 4 fingers of every hand across the bar. It’s essentially the most steady and safe grip, nevertheless it requires a excessive diploma of wrist and shoulder mobility.
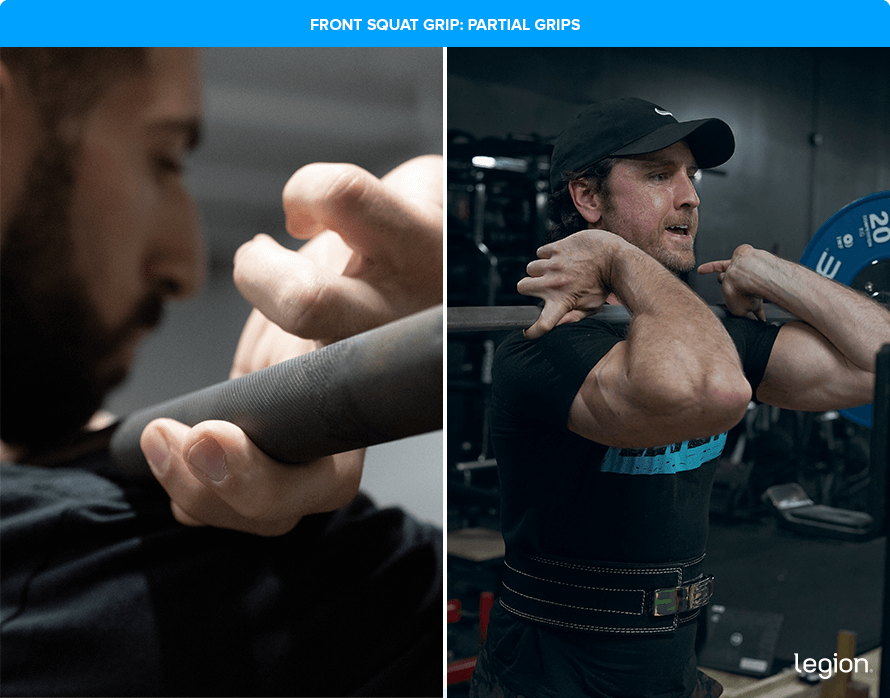
Partial Grip: For many who lack the mobility to keep up a full grip, the partial grip is a good various. Right here, you utilize one, two, or three fingers to carry the bar, as a substitute of your total hand. Whereas it’s not fairly as safe as the total grip, it’s often extra comfy and nonetheless offers stable stability throughout the squat.
Right here’s how a full grip seems:
And listed below are two partial grips utilizing 1 and a pair of fingers:
Easy methods to Maintain the Bar for Entrance Squats Utilizing the Entrance Rack:
Set the barbell within the squat rack at about collarbone peak.
Seize the bar with a shoulder-width grip, palms dealing with away from you.
Step nearer to the bar so it presses in opposition to the entrance of your shoulders. Push your elbows up and out in entrance of the bar.
In case your mobility permits, preserve all of your fingers below the bar. In the event you really feel discomfort in your wrists, elbows, or shoulders, take away 1-to-3 fingers, beginning together with your pinky and dealing towards your pointer finger.
Knowledgeable Ideas:
The bar ought to relaxation proper on the base of your throat—virtually prefer it’s choking you (however not fairly).
Don’t maintain the load in your fingers. Your fingers ought to assist preserve the bar from sliding ahead, however the weight ought to relaxation in your shoulders.
Deal with driving your elbows as much as preserve the right place, aiming on your higher arms to be as parallel to the ground as potential.
Stretch your lats earlier than performing the entrance squat. This could make the entrance rack place extra comfy.
To arrange your self for the place, maintain an empty barbell within the entrance rack whereas driving your elbows towards the ceiling. Maintain for 5-to-10 seconds, launch, and repeat 3-to-5 instances.
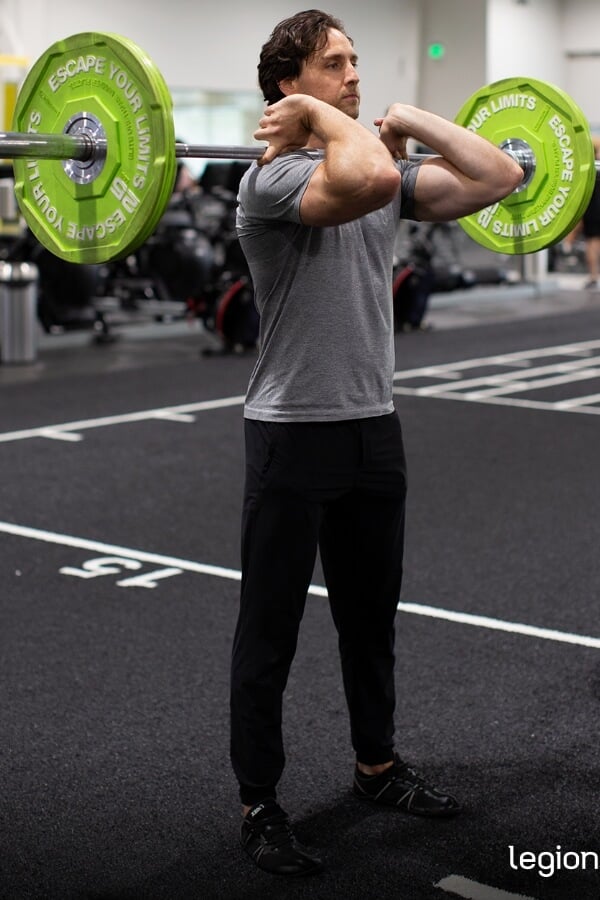
2. Crossed-Arm Entrance Squat Grip
The crossed-arm grip is a stable various to the entrance rack place, particularly for many who lack wrist or shoulder mobility.
On this grip, you relaxation the bar throughout the entrance of your shoulders, elevate your elbows up and out in entrance of the bar, and cross your arms over one another, resting your fingers on high of the bar simply outdoors the width of your neck.
Right here’s the way it seems:
Whereas the crossed-arm grip is less complicated in your wrists and shoulders, it’s not as safe because the entrance rack. With out the “wedge” out of your fingers below the bar, it’s simpler for the bar to slide ahead, and your elbows usually tend to drop.
In case your elbows drop, your torso will possible tip ahead, throwing off your stability and making the train more durable and probably extra harmful. So long as you retain your elbows up, nonetheless, the crossed-arm grip can nonetheless be efficient, not less than till the weights get heavy when stability turns into much more vital.
Easy methods to Maintain the Bar for Entrance Squats Utilizing the Crossed-Arm Grip:
Set the barbell within the squat rack at about collarbone peak.
Step nearer to the bar so it presses in opposition to the entrance of your shoulders.
Increase your elbows up and out in entrance of the bar so your higher arms are parallel to the ground.
Cross your arms over one another and relaxation your fingers on high of the bar simply outdoors the width of your neck
Knowledgeable Ideas:
As a result of this entrance squat hand placement can develop into unstable if the bar strikes, deal with holding your chest and elbows up all through every rep.
In the event you’re new to the crossed-arm grip, follow with an empty barbell first to get used to the hand positioning and stability.
3. Entrance Squat with Straps
Utilizing lifting straps for entrance squats mimics the sensation of the entrance rack place however requires far much less mobility.
To carry out entrance squats with straps, wrap the straps across the barbell barely narrower than shoulder-width aside, then seize the unfastened ends. Push your elbows up and out in entrance of the bar till your fingers are above your shoulders, holding the straps.
Primarily, lifting straps compensate for restricted mobility by permitting your fingers to relaxation above the bar, relatively than below it.
Right here’s the way it seems:
Whereas utilizing lifting straps for entrance squats is steady and cozy, it’s nonetheless not as efficient because the entrance rack. For that purpose, I like to recommend utilizing this grip as a stepping stone to enhance mobility.
It really works effectively for this as a result of it permits you steadily inch your fingers nearer to the bar, making it simpler to work towards a correct entrance rack place over time. As soon as your flexibility improves, it is best to transition to the entrance rack place.
Easy methods to Entrance Squat with Staps:
Set the barbell within the squat rack at about collarbone peak.
Wrap lifting straps across the barbell barely narrower than shoulder-width aside, feeding the unfastened ends via the loops.
Step nearer to the bar so it presses in opposition to the entrance of your shoulders.
Seize the unfastened ends of the straps in every hand and push your elbows up and out in entrance of the bar.
Knowledgeable Ideas:
Grip the straps however don’t wrap them round your fingers. Wrapping them could make dropping the bar more durable, which might trigger issues should you fail a rep or lose stability and must dump the bar.
Transfer your grip an inch or so nearer to the barbell each few weeks of coaching. Over time, this can aid you acquire the flexibleness required to carry the entrance rack place.
You probably have very massive biceps, chances are you’ll by no means be capable of maintain the entrance rack place. In that case, performing the entrance squat with straps is an efficient workaround.
FAQ #1: What’s the right entrance squat hand place?
It relies upon. The entrance rack grip is usually the very best hand place for entrance squats as a result of it provides essentially the most stability.
Nevertheless, should you lack the wrist or shoulder mobility to carry the bar correctly within the entrance rack place, entrance squatting with straps or utilizing the crossed-arm grip are good options. These grips are gentler in your joints however aren’t as safe, particularly because the weights get heavier.
FAQ #2: What grip do you have to use if the entrance squat causes wrist ache?
If entrance squatting utilizing the entrance rack causes wrist ache, attempt utilizing the crossed-arm grip or lifting straps. The crossed-arm grip reduces the pressure in your wrists by permitting you to carry out the train together with your fingers resting on high of the bar.
Performing the entrance squat with straps is one other workable answer because it lets you mimic the entrance rack place with out requiring you to wedge your fingers below the bar.
FAQ #3: What’s the very best entrance squat grip width?
As a basic rule, your fingers needs to be about shoulder-width aside or barely wider when utilizing the entrance squat rack place. That stated, your particular person physique mechanics could change this, so mess around with grip width till you discover a place that’s comfy and lets you carry out the train comfortably and with out your elbows dropping.
Source link

